Xamarin iOS Swift Getting Started
This will guide you through setting up and managing authentication and authorization in your apps using cidaas SDK.
Click here for Sample Project.
First Get Your Credential
Once you are registered with cidaas, you can able to create your own Apps. Register with cidaas Try Now. Click here to know the steps to create Application.
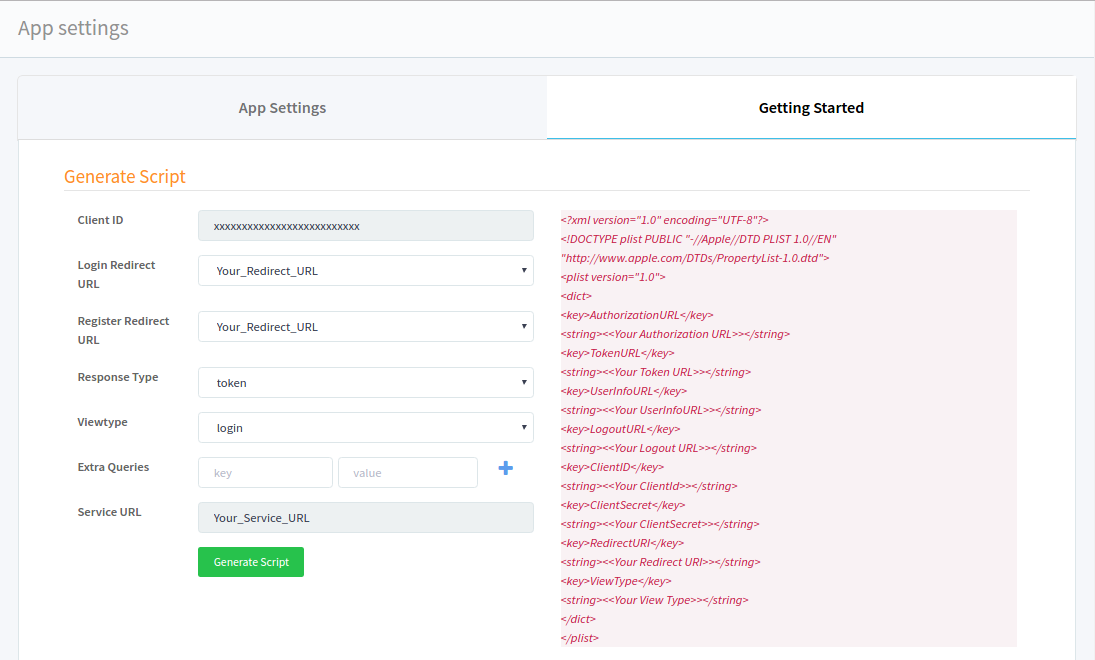
There are some details about your Application that your application needs to know about properly communicate with cidaas, including your Client ID and Client Secret. You can retrieve these values from the settings area for your Application in the cidaas App Settings page.

Setup Your Callback URLs
Basically a callback URL gives directions to an external system on where to go next. What is at that URL could be anything.
You need to whitelist a callback URL for your app in the Callback URLs field in your Client Settings. If no callback URLs are set, a mismatch error will be displayed when a user logs in.
The Callback URL should be set like
http://www.myhostname.com, http://localhost:9000
Scope Management
Basically a scope management gives additional level of permissions or access rights for each user,as per the business requirements of the customer, using the scope - parameter.
cidaas checks to ensure that the defined scope matches with the actual scope allowed for the user, and appropriately grants access to the registered/logged in user.
Click here to know the steps to setup Scope Management.
Getting Property File
Once you created the Application successfully, you will get the property file of your application from our cidaas AdminUI.
Install cidaas_sdk
Integrate your application with cidaas you requires our cidaas-sdk-ios library. You can retrieve this library from CocoaPods.
Copy the property file content from your adminUI and paste it to the app where you want to integrate or you can just download the Property file and insert into your app where you want to integrate
<?xml version="1.0" encoding="UTF-8"?>
<!DOCTYPE plist PUBLIC "-//Apple//DTD PLIST 1.0//EN" "http://www.apple.com/DTDs/PropertyList-1.0.dtd">
<plist version="1.0">
    <dict>
        <key>AuthorizationURL</key>
        <string>your authorization url</string>
        <key>TokenURL</key>
        <string>your token url</string>
        <key>UserInfoURL</key>
        <string>your user info url</string>
        <key>LogoutURL</key>
        <string>your logout url</string>
        <key>ClientID</key>
        <string>your client id</string>
        <key>ClientSecret</key>
        <string>your client secret</string>
        <key>RedirectURI</key>
        <string>your redirect uri</string>
        <key>ViewType</key>
        <string>your view type</string>
        <key>SocialUrl</key>
        <string>your social url</string>
    </dict>
</plist>
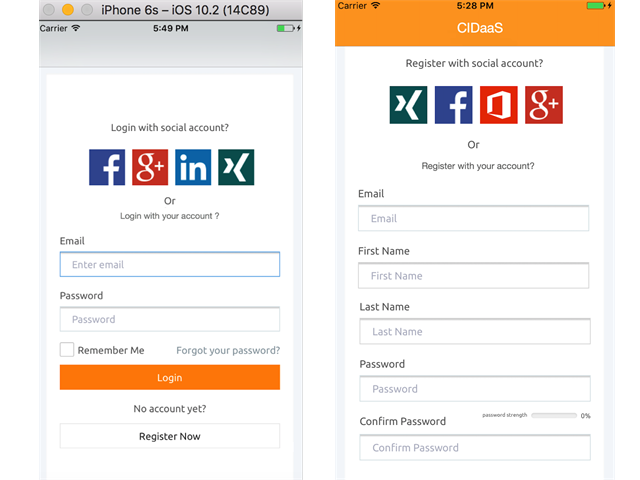
Secure Login and Register
Before use the cidaas-sdk-ios functionality, you should call the Create().
    var cidaas = CidaasSDKView.Create();
    cidaas.Frame = View.Frame
After instance created, you can use the instance for cidaas access.
You can simply call the onLoginSuccess() method where you want to implement the login functionality.
cidaas.OnLoginSuccess += (sender, e) =>
{
    // your code (what you want to implement)
};
The login functionality will work with the scope cidaas:login , this scope will add default when you create a new Application.
You can simply call the same OnLoginSuccess() method for implement the register functionality also.
Notes : depends on the viewtype of your property file it will automatically work Login / Register functionality
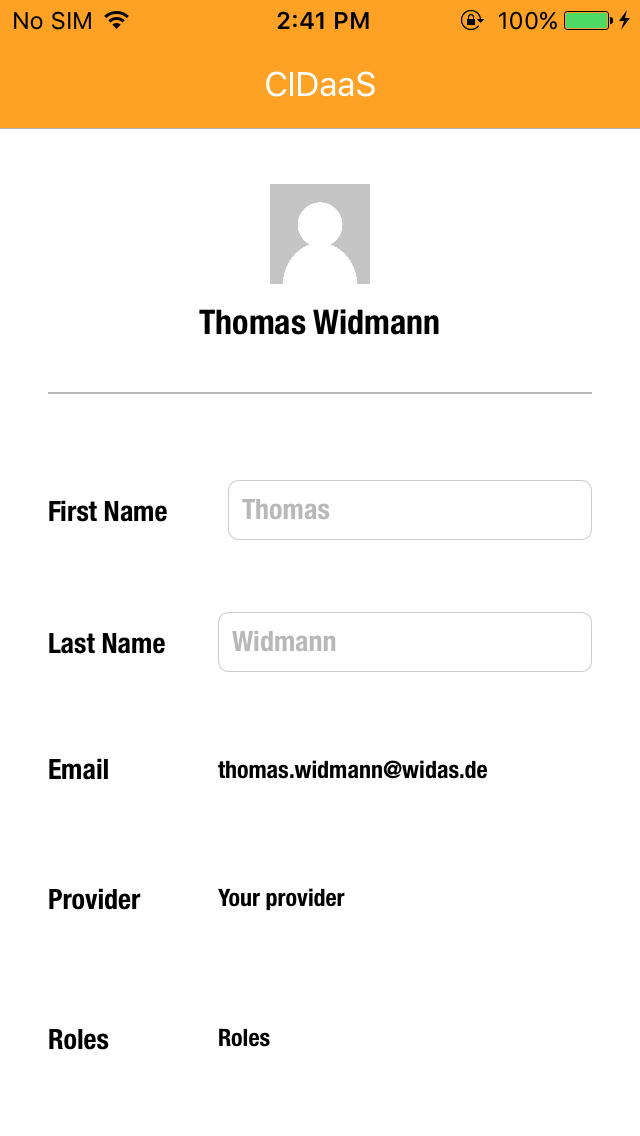
User Profile
Basically user profile gives a requirement to retrieve and show profile information and You can manage (e.g. your password, email address, avatar image) in your user profile to the authenticated user.
You can simply call the GetUserInfoByAccessToken(access_token) method to retrieve the user personal information as JSON fromat.
cidaas.GetUserInfoByAccessToken(accessToken)
Logout
This logout provide to end access to your application. Logging out informs the application that the current user wishes to end the login session.
You can simply call Logout() method to inform the current user login session end.
CidaasSDKView.Logout(userid);